| A TELEPHONE STAND AND STOOL
The stand shown
in the
accompanying illustration is for use with a desk telephone. The stool
when not in use, slides on two runners under the stand.

Stand
and Stool Complete
A shelf is provided
for
the telephone directory, paper, pencil, etc.
The joints may
be made
with dowels, or the mortise and tenon may be used, as desired. If the
latter is decided upon, allowance must be made on the length of the
rails for the tenons. The list given is for the dowel-made joints.
The following stock list gives the amount of material needed which
should be ordered planed and sanded. This work can be done by hand if
the builder has the time and desires to have an entire home-made
article. However, the list is given for the mill-planed material.
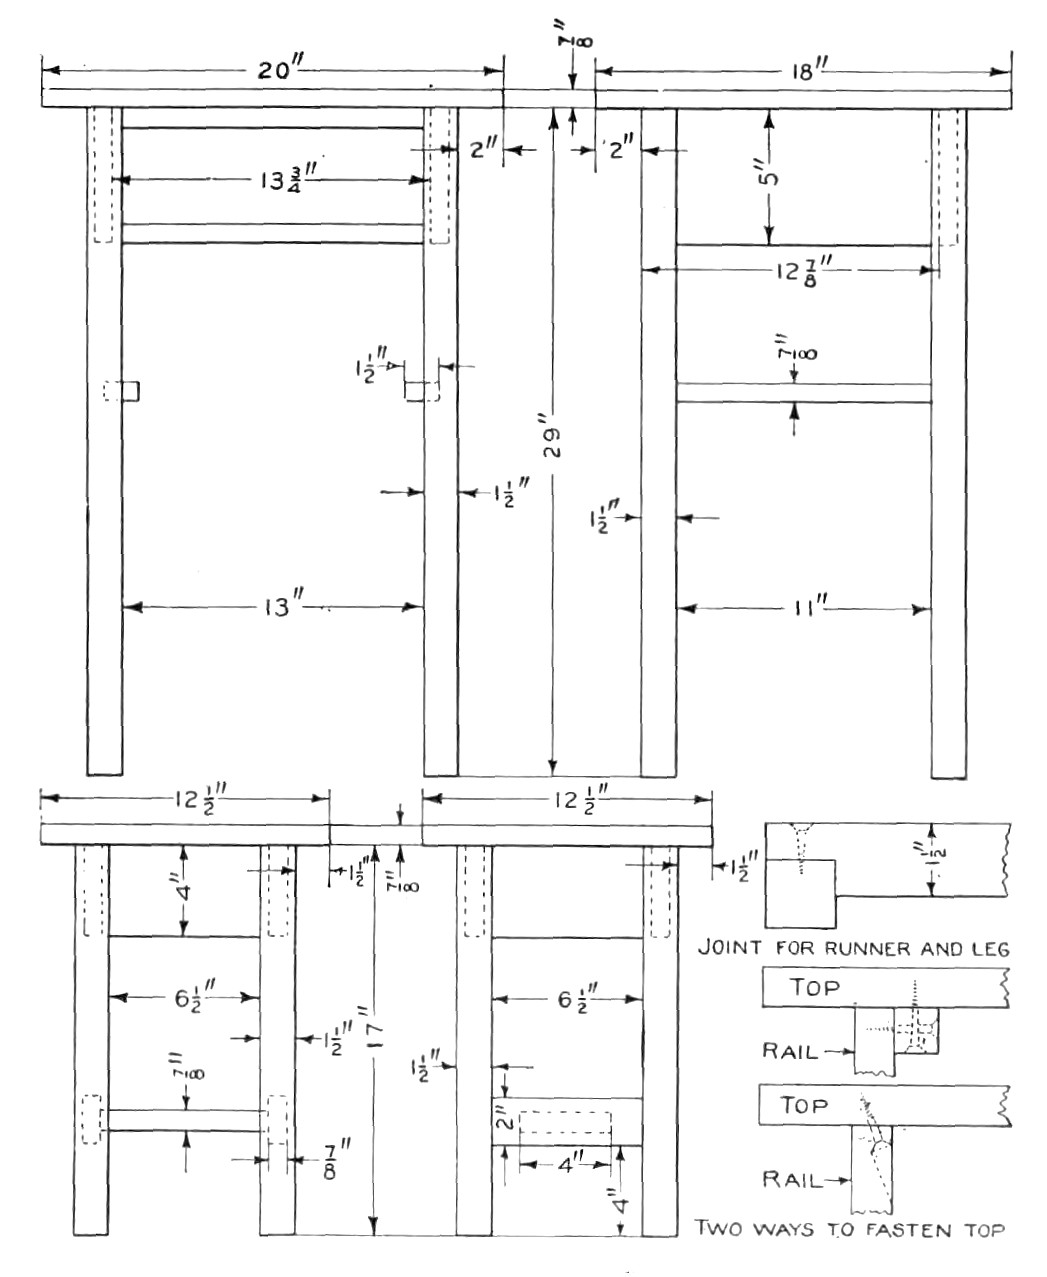
Details
of Stand and Stool
STAND
4 posts, 1 1/2 in.
square
by 29 in.
2 rails, 7/8 by 5
by 11
in.
1 rail, 7/8 by 1
1/2 by
13 in.
1 rail, 7/8 by 5 by
13
in.
2 runners, 7/8 by 1
1/2
by 14 in.
1 top, 7/8 by 18 by
20
in.
1 shelf, 7/8 by 12
7/8 by
13 3/4 in.
STOOL
4 posts, 1 1/2 in.
square
by 17 in.
4 rails, 7/8 by 4
by 6
1/2 in.
4 rails, 7/8 by 2
by 6
1/2 in.
1 stretcher, 7/8 by
4 by
7 1/4 in.
1 top, 7/8 by 12
1/2 in.
square.
The exact
lengths for the
posts are given in the list. Should the builder desire to square them
up, allowance must be made for this when ordering stock.
Arrange all the
pieces in
the position they are to occupy in the finished stand and stool and
number all the joints. Locate the centers and bore holes for all the
dowels. Assemble the two sides of the table first. Notch the runners
and fasten them to the posts with flat-head screws. Use hot glue on
the dowel joints if possible.
Cut the corners
out of
the shelf to fit the legs and assemble the frame of the table. Use
round-head screws through the rails to hold the shelf. The top may be
fastened in two ways, with screws through cleats on the inside of the
rails and under the top, or with screws slanting through the upper
part of the rails and into the top as shown. The stool is assembled
in the same manner as the stand.
The stand and
stool
should be finished to harmonize with the furniture and woodwork of
the room in which they are to be used.
(Click for larger image)
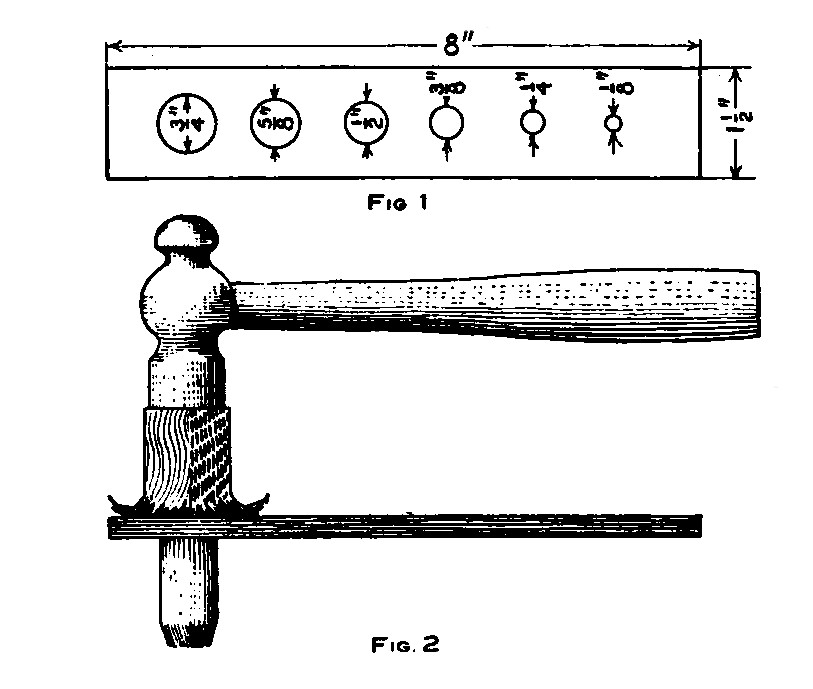
HOW
TO MAKE A DOWEL-CUTTING TOOL
Secure a piece
of steel
about 1/4 in. thick, 13/4 in. wide and 8 in. long. Drill various
sized holes through the steel as shown in Fig. 1, leaving the edge of
each hole as sharp as the drill will make them. Cut off a block of
wood the length necessary
for the dowels
and split
it up into pieces about the size for the particular dowel to be used.
Lay the steel on something flat, over a hole of some kind, then start
one of the pieces of wood in the proper size hole for the dowel and
drive it through with a hammer, as shown in Fig. 2. The sharp edges
on the steel will cut the dowel as smooth and round as if it were
turned in a lathe.
Easy
Way to Make Dowels
A MEDICINE CABINET
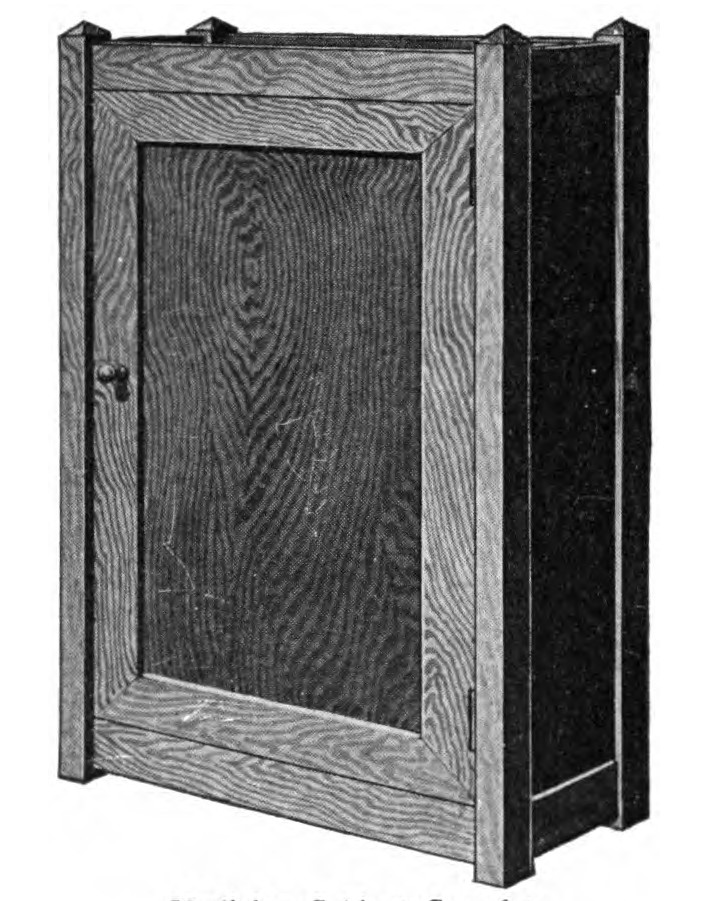
Medicine
Cabinet Complete
This cabinet is
best made
of quarter-sawed oak, as this wood is the most easily procured and
looks well when finished. Order the stock from the mill ready cut to
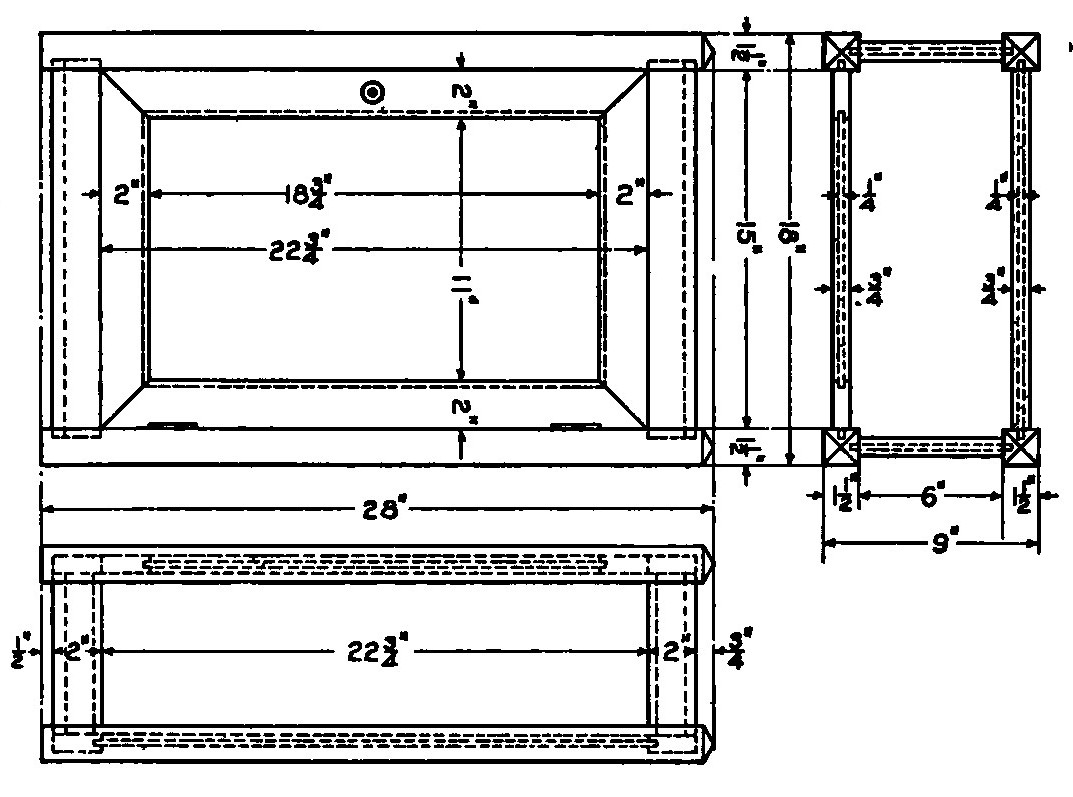
length, squared and sanded. The following pieces will be needed:
4 posts, 1 1/2 by 1 1/2
by 28 in.
4 side rails, 3/4
by 2 by
16 in.
4 end rails, 3/4 by
2 by
7 in.
2 door rails, 3/4
by 2 by
15 in.
2 door rails, 3/4
by 2 by
22 3/4 in.
1 door panel, 1/4
by 11
1/2 by 19 1/4 in.
1 bi.ck panel, 1/4
by 15
1/2 by 23 1/4 in.
2 end panels, 1/4
by 6
1/2 by 23 1/4 in.
2 pieces for top and
bottom, 1/2 by 6 3/4 by 15 3/4 in.
Square the four
posts and
bevel the tops as shown. Cut grooves in them with a plow plane to
receive the 1/4 in. panels. The tenons on the rails are cut 1/4 in.
wide and fit into the grooves in the posts the same as the panels.
The rails have grooves cut at the inside edges for the panels. The
front posts do not have grooves on the inside but have two mortises,
one at each end for the top and bottom rails. The back has a panel
fitted in the same as the ends. See that the pieces fit together
perfecly square and tight, then glue them together and give it time
to dry.
The top and
bottom boards
are next put in place. The top is placed in the center of the top
rails while the bottom is put even with the lower edge of the bottom
rails, as shown in the detail drawing. The door frame is mitered at
the corners and rabbeted on the inner edge to take the panel. A
mirror can be used in place of the panel if desired. Suitable hinges
and a catch, which can be purchased at a hardware store, should be
supplied for the door.
The shelves are
of soft
wood and are to be arranged to suit the maker. Before applying a
finish, go over the cabinet with fine sandpaper and remove all the
surplus glue about the joints and the rough spots, else the finish
will not take evenly. The finish can be any one of the many different
kinds supplied by the trade for this purpose.
(click for larger image)
|
 Web
and Book design image,
Web
and Book design image,