
Web
and Book design,
Copyright, Kellscraft Studio 1999-2016 (Return to Web Text-ures) |
 (HOME)
|
A
BLACKING CASE TABOURET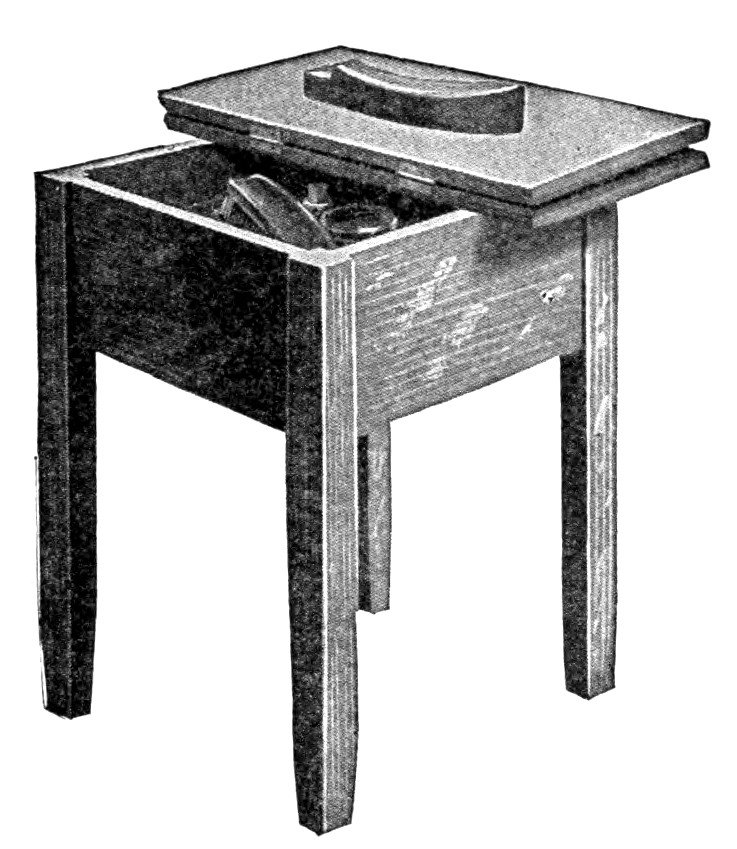 A substantial piece of mission furniture which may be used as a tabouret or plant stand as well as a blacking case, in which there is a receptacle for brushes, blacking and a shoe rest, is shown in the illustration. The stock can be secured millplaned, sandpapered and in lengths almost ready to be assembled. The stock list consists of the following pieces: 4
posts, 1 1/2 by 1 1/2 by 17 in.
4 side rails, 1 by 6 1/2 by 9 1/2 in. 2 top pieces, 1 by 8 1/4 by 16 1/2 in. 1 bottom, 1/4 by 9 1/2 by 9 1/2 in. 1 cleat, 1 by 1 by 18 in. The posts and cleat are surfaced on four sides, while the other pieces are surfaced on only two sides. The allowance of 1/2 in. on the side rails, top and bottom, is for fitting the joints. Be sure the surfaces of the pieces for the posts are square and the ends sawed square off, making the posts exactly the same length when they come from the mill. Square up the four side rails to 6 by 9 in. Cut one end of each post tapering with a chisel; face and sandpaper the posts and side rails before making the joints. The side rails are attached to the posts with three dowels to each joint. The place for each dowel is located by making a line exactly in the middle length wise on each end of each side rail. Three lines are made to intersect this middle line, as shown in the detail. Drive a 1/2 in. brad in each intersection allowing a small portion of each brad to project, and cut off the heads. Gauge a line in the middle of each post at the top where the joints are to be made and press the end of a side rail containing the brads against the post. This will mark the places to bore holes for the dowels. Pull out the brads and bore holes for the dowel pins. 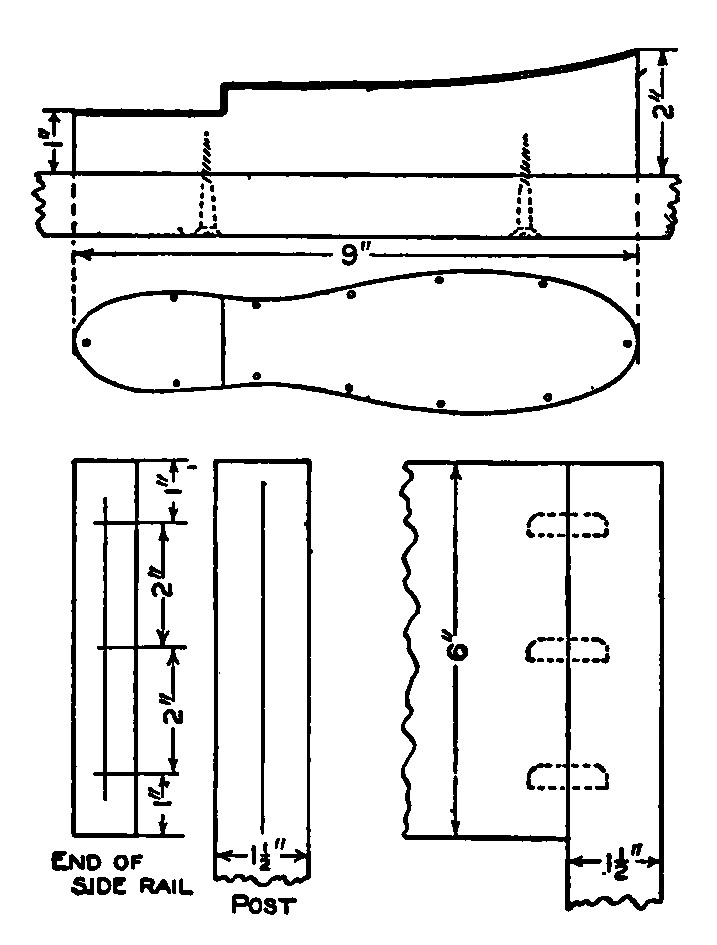 Details of Shoe Rest When gluing up the side rails and posts, first put on a coat of glue on the ends of the side rails and let it dry. This will fill up the pores in the end grain of the wood which will make a strong joint when finally glued together. The dowel pins are made 3/8 in. square with a slight taper at the ends. These can be easily forced into the holes, when the ends of the side rails are coated with glue and ready to be put together, by clamps pressing on the outside of the posts. The bottom is held in position with narrow strips tacked on the lower edge of the side rails. Square up the top pieces to 8 by 16 in. and fasten one piece to the top with cleats and screws as shown in the drawing. The other piece is hinged to the first one with two 2 in. hinges. The shoe rest can be made from a block of wood and covered with sheet tin, copper or brass, or a cast-iron rest can be purchased. The rest is fastened to the under side of the hinged top. Stain the wood any dark col& and apply a very thin coat of shellac. Put on wax and you will have a finish that can be renewed at any time by wiping with a little turpentine and rewaxing. 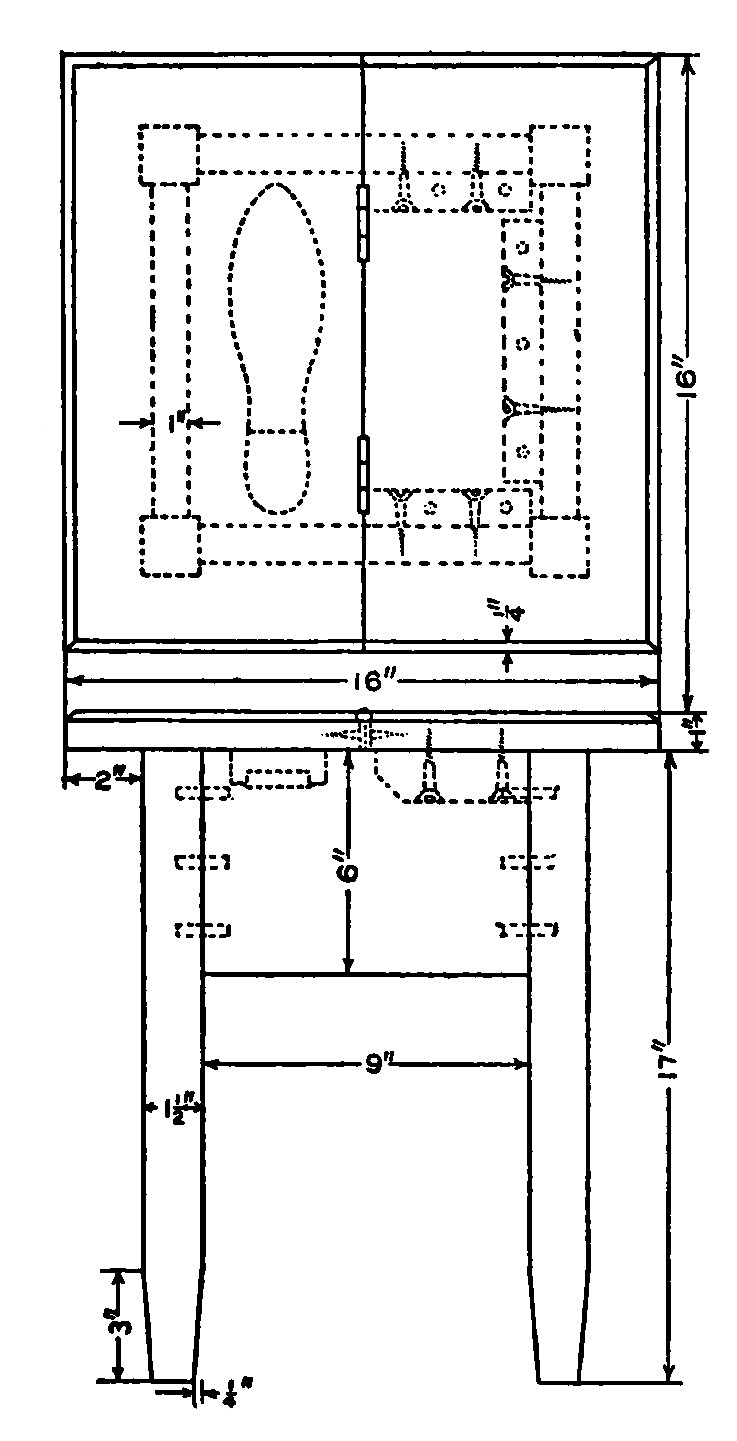 Details of Tabouret Construction |
 Click the book image to turn
to the next Chapter.
Click the book image to turn
to the next Chapter.